

tips for photographing your own newborn
Congratulations on your new baby!
I would love to share with you some tips and ideas to help you create beautiful images of your own baby and to make this experience an enjoyable and stress-free one for the both of you.
The sweetness of a newborn baby is very precious. It is special to have some of those moments captured for memory sake. God knows they grow quickly!
I want to give up some basic instructions and tips on how to capture some of the best photos of your sweet newborn. I know this won’t quite be the same as a professional newborn shoot, but its the next best thing.
If you are doing it yourself you might find some of this information helpful, chances are this will be your first time and you haven’t had a chance to photograph your little one as part of a process where you wish for an outcome similar to the one we achieve in studio.
I’d like to take this opportunity to reassure all, that we will still be able to capture cherished memories for you, irrespective of the timing. Your precious baby will always have an unbelievable and unique story to share about the timing of their arrival into the world. I am so looking forward to be a part of that story as soon as I am able.
“The flower that blooms in adversity is the most rare and beautiful of all.”
― Walt Disney's Mulan
Take Your Time
One of the benefits of photographing your own newborn is that time is on your side. Unlike shooting a newborn session for a client and having a 3-4 hour window in which to work and create a varied gallery, you have days – weeks even – at your disposal.
Remember that you just had a baby! You need to take time for yourself to rest and recover from the childbirth experience, so please do not rush and try to do everything in one day.
Remember, time is on your side! Take it easy and don’t over-do it. If you pace yourself, you can capture an amazing variety of images of your sweet new baby.
There are a few simple things you can do that will ensure a happy baby and a productive photo session. The first is to keep your shooting area warm – really warm
In addition to having a warm shooting area, white noise does wonders for keeping baby asleep
The third trick probably goes without saying but make sure baby has a nice, full belly and is not hungry during your shoot
In addition to these three things, I have found that most babies are much more cooperative and ‘lazy’ in the morning hours than in the afternoon and evening hours. Try to do your shooting between breakfast and lunch.
Also, on photographing alone - when composing your photograph, follow the rule of thirds ...
Definitely turn off your flash
Before you take the shot, check the scene for any distracting elements. Move closer, or change your viewpoint to compose your photograph
Keep baby safe
This goes without saying, but please make sure your baby’s safety is the number 1 priority while you are taking his or her photos. If you are trying a more difficult pose or working with props, have someone there to help you and to spot baby.
My newborn photography style is simple and organic with more natural posing, so this is not an issue for me. But if you feel that need help, make sure that you ask for it or simply plan for the shoot with your partner.
Use Natural Light and remember lighting is everything.
You do not need any fancy studio equipment to get this right. In fact you don’t need any of it at all. All newborn photos you see from me are done in my studio in front of one of my windows utilising only natural light. Don’t be tempted to and switch off all the lights in the room you are planning to shoot.
A good rule of thumb for nice soft shadows and highlights is to have your baby angled such that the light flows from the top of baby’s head on down their body at approximately a 45 degree angle. Look for a soft shadow underneath baby’s nose to verify that you have this right.
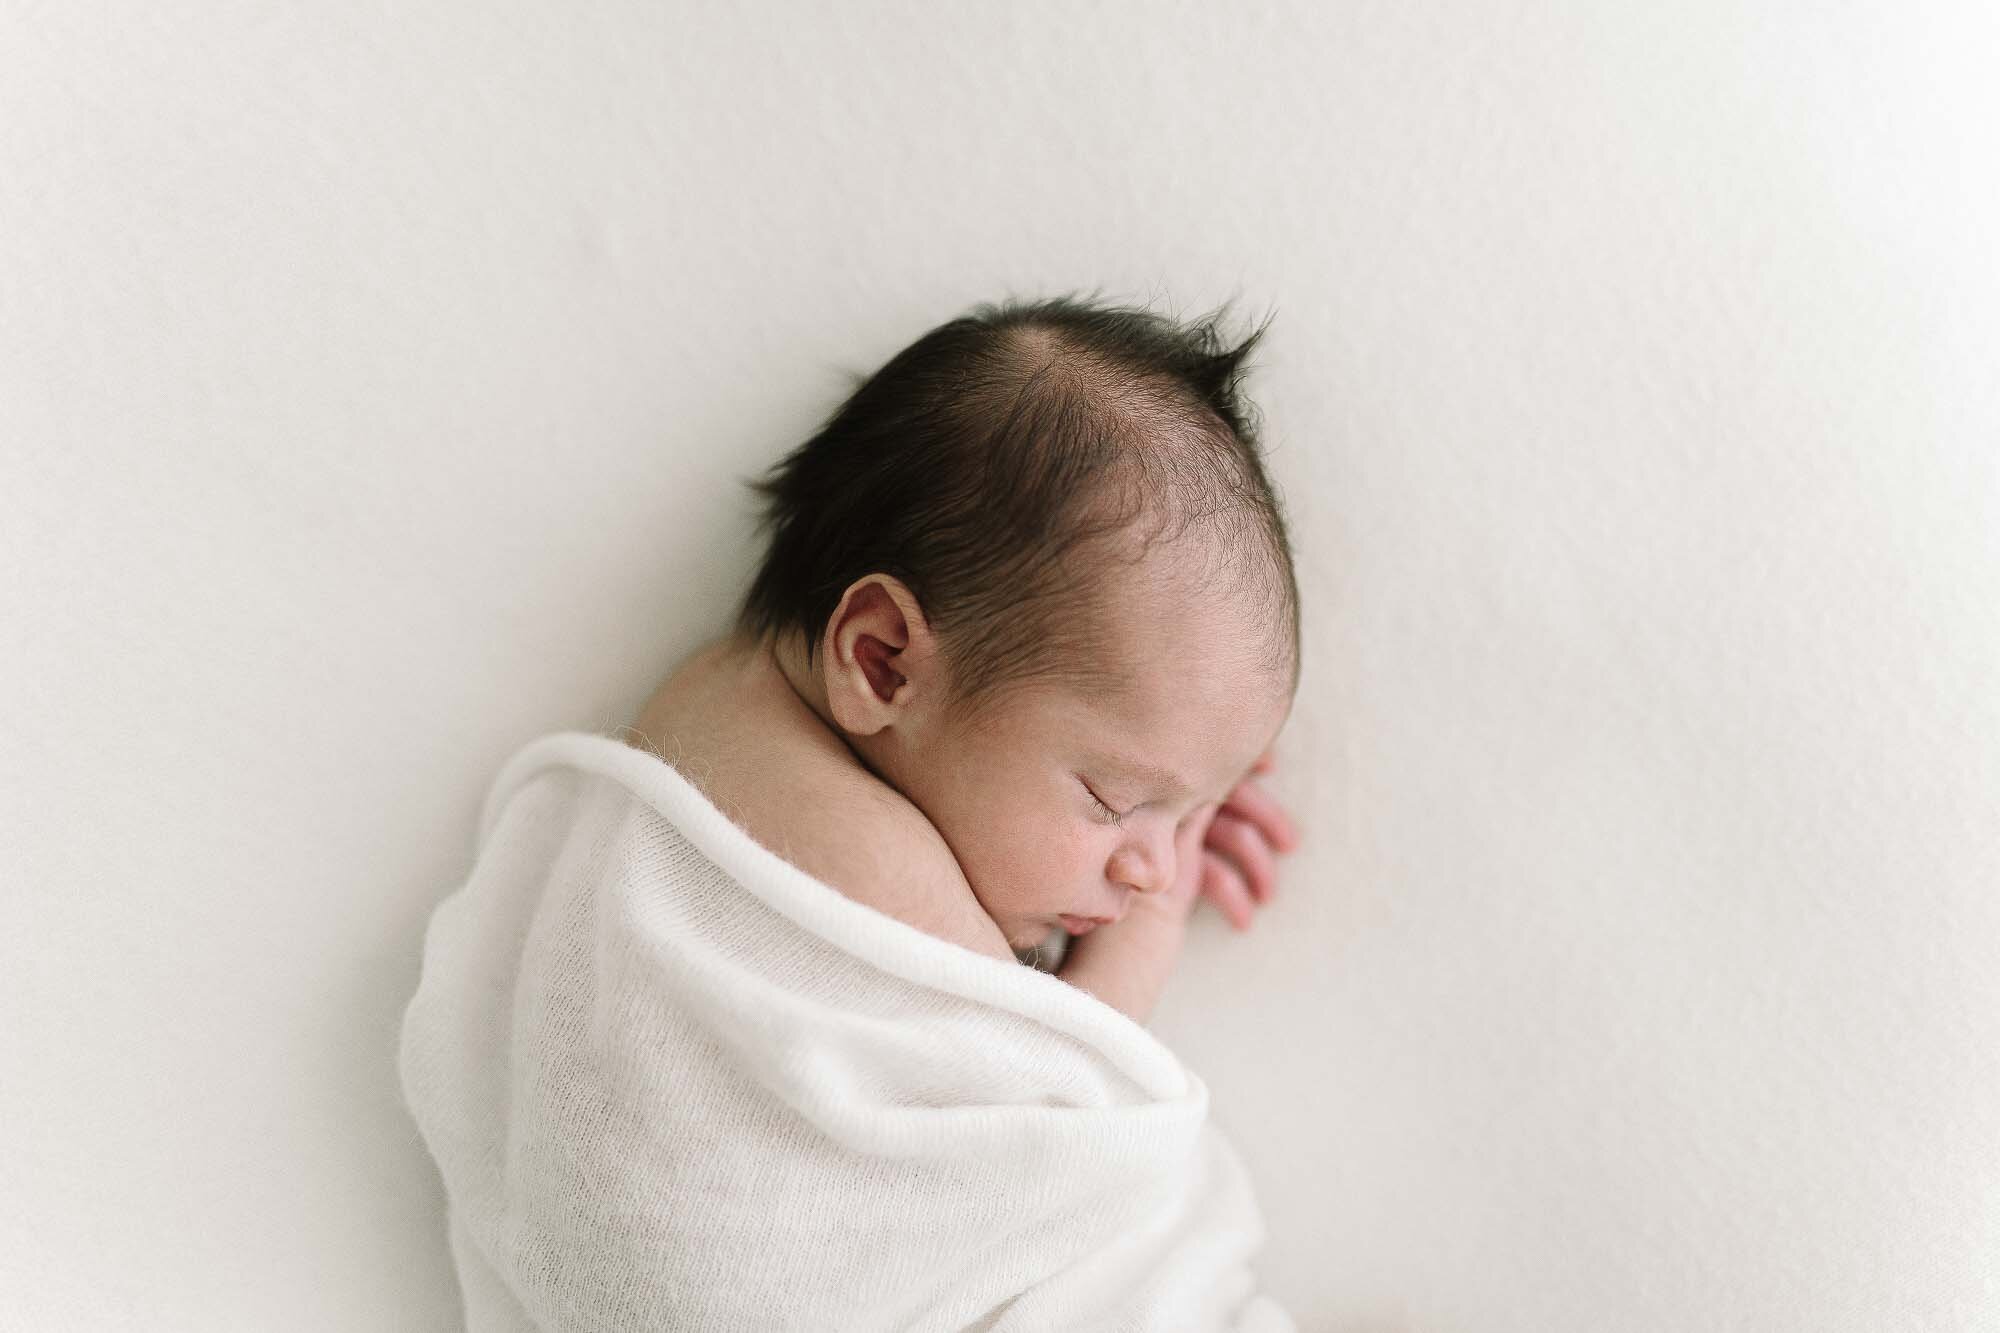
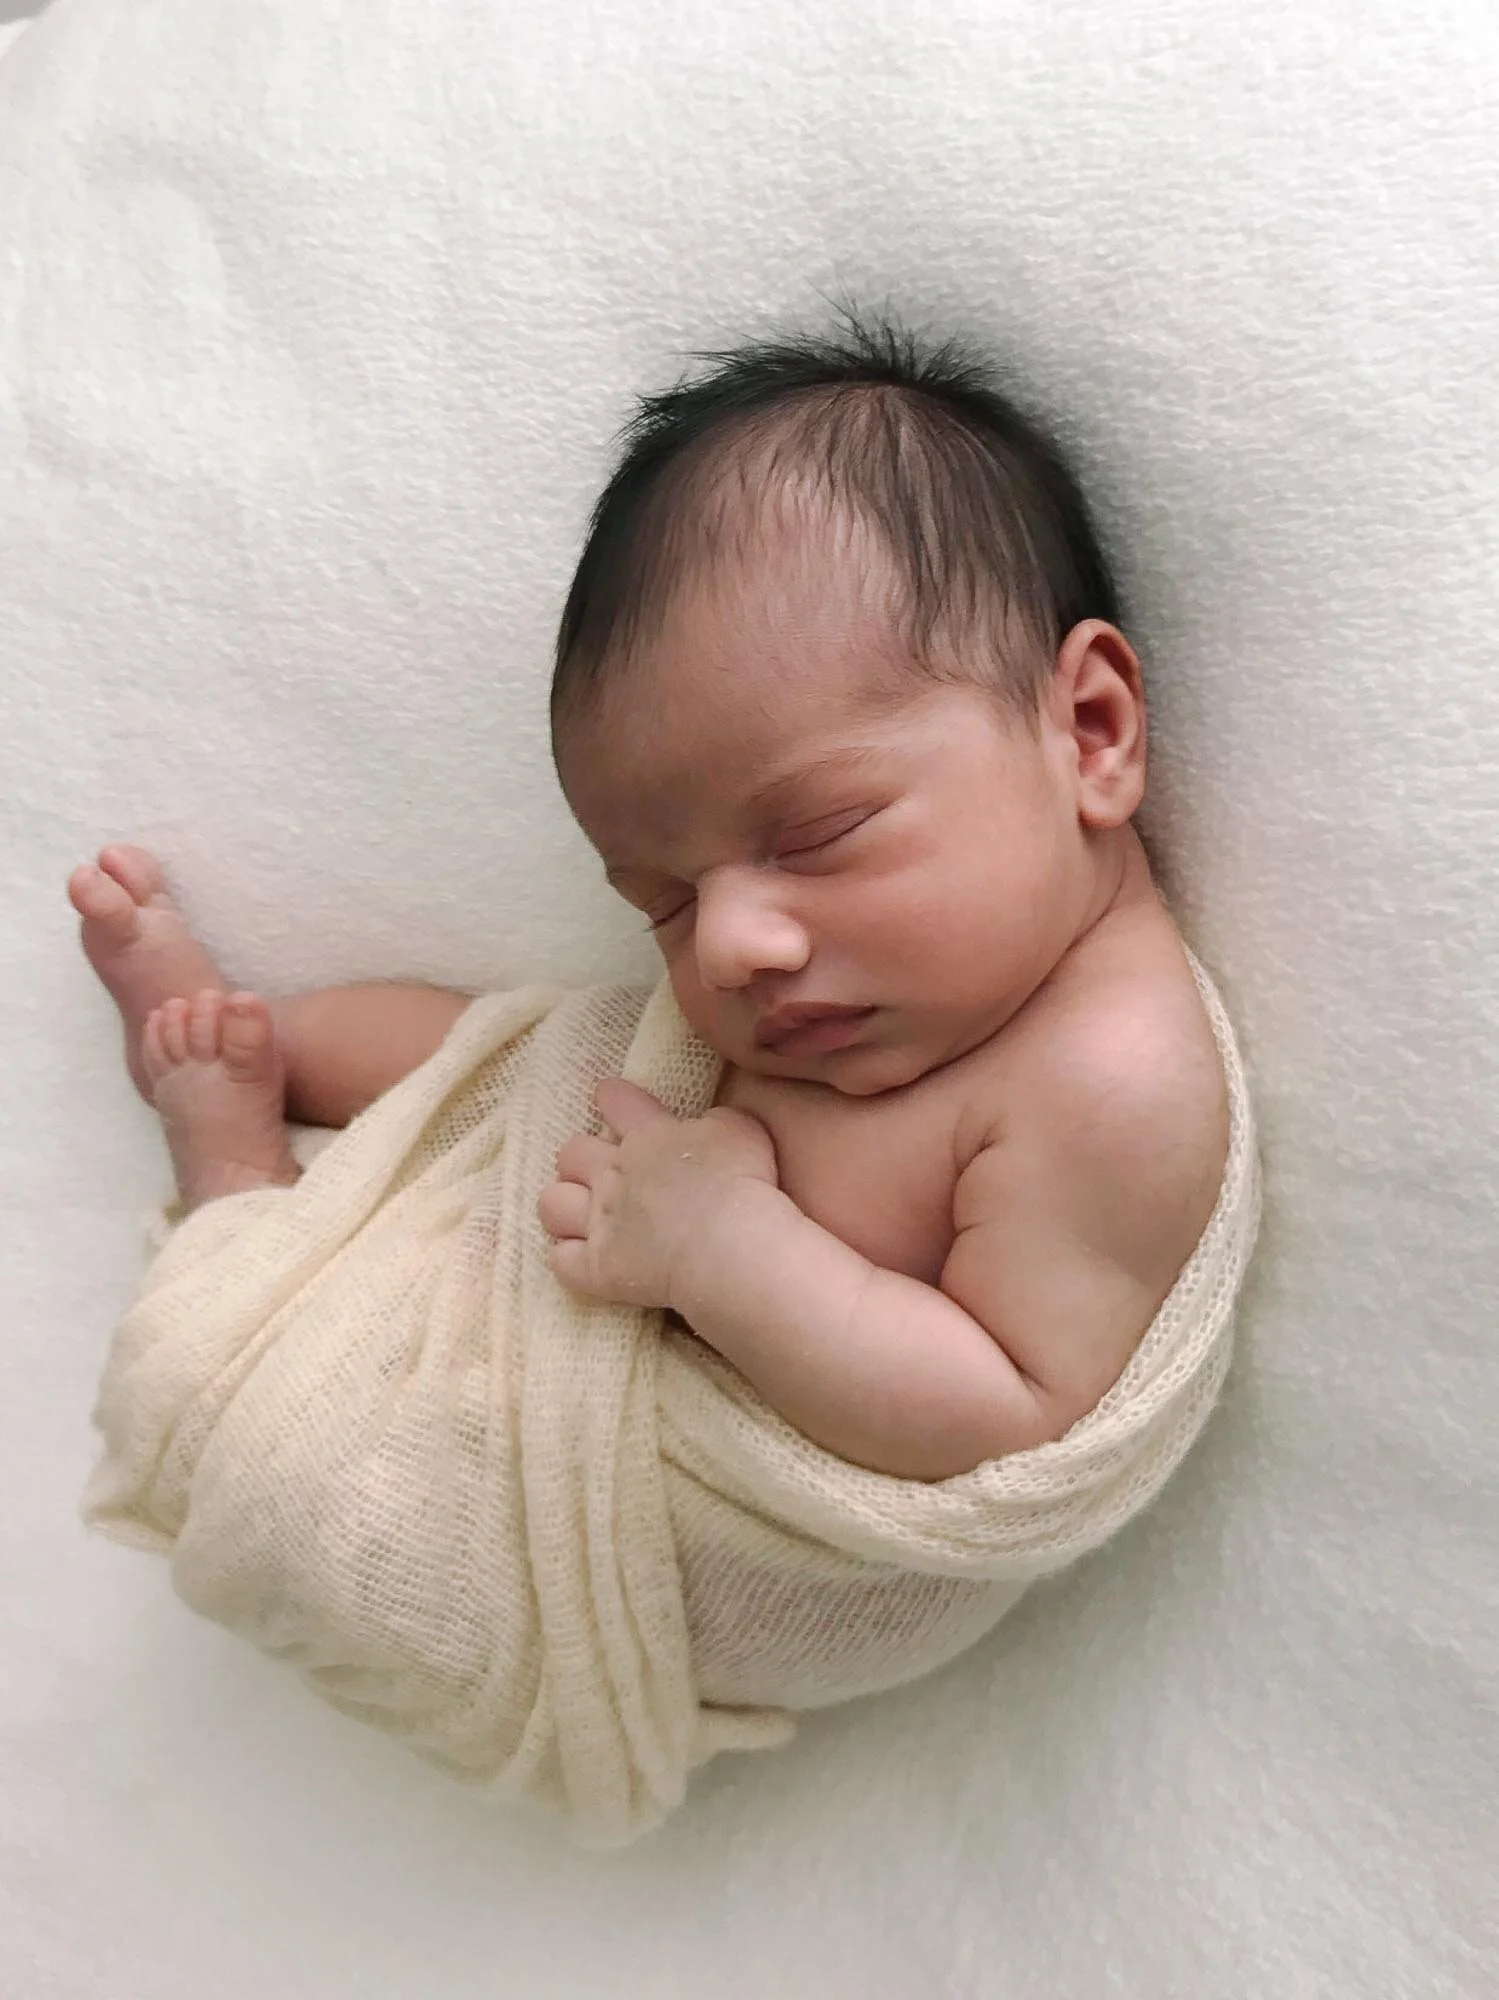
Dressing and swaddling
Dress baby in a simple white long sleeve onsie, like the one on the picture. You don’t need to undress your baby for the session and all wrapping can be done over it.
Prepare natural simple stretchy swaddle you’ll use to wrap your baby. You can use winter cotton scarf too, as long as it is stretchy. Typical swaddles that are available for newborns are not very good because there is very little give in the fabric. You’ll find they are too bulky to wrap with and end up being loose. Stretchy ones will be much more helpful in swaddling your little one and keeping them happy for long. You can actually diy your own by cutting the bottom half off your large unwanted white t-shirt :) Just make sure that you also split it on the side and end up with a long piece of fabric. I’d be confident to say that places like spotlight should have some white stretchy jerseys that you might want to find as alternative - you won’t need more than 50cm of the fabric.
Window light
Choose a room with one side source of light, skylight in the room or corner windows bright rooms are not advised.
Place a sheer over your window to soften the light streaming in, otherwise the contrast between shadow and light will be too much for your phone camera or analogue camera to produce satisfactory results.

simple white onsie with long sleeve

behind the scenes: baby swaddled tightly. Arms out but held well by the swaddle, legs down

behind the scenes: non stretchy swaddle

behind the scenes: legs up - comfortable for baby and great when you are aiming to show the toes off! I have included this wrapping style in the video below.

arms tucked in + tight swaddle + full tummy + winded = happy baby

Suggestions on where to photograph
You can try and create a space similar to the one that I have in studio - where baby is placed on a beanbag next to a large window. Here you can use a beanbag if you have one at home or try and make something similar with duvets. Try using at least two of them folded in four and lay them down on the ground by the widow you’ve chosen. The more bedding you have the better. For the safety and comfort, please gather as many blankets and bed throws (not towels) as you can and place them on top of the beanbag creating layers upon layers of comfort and a soft base for the baby. Leave the white/light coloured blanket on top and press it in the middle to create a well where you’ll place your baby.
Alternatively, you can also adapt a route of a lifestyle newborn session and use your bedroom with your master bed as a place to take photographs. This option will work if you have a bright bedroom and bed is near the windows. Using simple white or natural coloured bedding works best. Coloured and patterned bedding is too strong for photographing newborns. You can also add texture by adding a nice bed throw. Below you’ll find an examples of a newborn baby shots on bed.
Time To Pose
When getting your baby into a photo position be very gentle. I know that you know this, but the easier you are the less likely your baby will start to get fussy. Babies can get a bit cranky if you keep moving them from their comfortable positions.
So, take slow and gentle movements when getting them into their pose.
LIFESTYLE SESSION- SHOOTING ON BED
(this session focuses on your baby photographed in the background of your home)
whatever the direction of the light - baby should best be placed parallel to it
cover your window with sheers to soften the light. Sheer will act like a diffuser and light coming through it will be gentle and more even on baby’s skin
one source of light from one side only - skylights or rooms with more than one widow wall are not suitable
one pose & four different angles - experiment with your positioning to capture baby in multiple angles and perspectives for a variety of without even needing to move your baby
try to capture big bed & tiny baby in a wide shot
don’t forget baby details - focus on feet, profile of baby up close
generally when shooting pulled back shots at home, try to compose your photo so the horizon and references to it (like bed line) are portrayed naturally


Big bed & tiny baby - your own bed is a lovely big space which will give you opportunity to shoot wide frames and still fill the frame with the bed. Secondly, including all this negative space is a great way to highlight your baby’s size


BEANBAG BABY SESSION
(this session’s main focus is on your baby only portraits on neutral background)
similarly, cover your window with sheers to soften the light coming through
use a room with one source of light, coming from one side only
feed, burp and swaddle tightly and make sure your baby is comfortably asleep before you place him/her on the beanbag
the best way to position newborns is with their head nearest the light source, so that it washes down their body rather than up-lighting them and illuminating the inside of their nose! Look for a little shadow under the nose to confirm you’ve positioned your baby correctly.
Depending on the strength of your light, start by placing your newborn around 2m from the source.
one pose will offer you an opportunity for portraits from a few angles: portrait from above, side, details of baby’s feet from above, closeup of baby profile
don’t forget to photograph the baby details (keep in mind that your iPhone won’t be able to focus if the lens is too close to your subject. To capture extreme close-ups of tiny detail, you’ll need a macro lens)
experiment with angles and have fun!


This is an example of an I-phone photograph of a baby in studio that I have done on one of my previous sessions before the Covid-19 restrictions. I have then worked on correcting tones (mid example) and turned the same photograph to BW. The challenge of course is that unless you’re a photographer or professional photo editor, then you’re unlikely to know your way around Photoshop or Lightroom. But there are loads of apps out there that are pretty easy to get used to that help to bring the shadows up and correct the skin tone. For this you’ll need to look at photo editing app not the app that applies filters.
Once you have manipulated your image for tones/shadows/edited light curves, you can apply powerful yet subtle effects to your photos. VSCO is one the apps for applying beautiful understated filters to your images that I have used in the past. Experiment and have fun!
I have attempted to video some of the steps of photographing newborn. Below you can find an example of simple swaddling, positioning and finally the basic angles of how you can photograph your baby. Feel free to take a look (no sound necessary).
Lastly, include your older children.
Some of the sweetest and most endearing photos you can take of your new baby will be the ones you get with his or her older siblings. Older children may be able to hold their new brother or sister, while simple laying down poses are perfect for younger children. This will make your older children feel special and involved as well, which is always a bonus when there is a new baby in the house getting a lot of attention!
Photographing your own newborn can be challenging but also so very rewarding. If you want to include older children in your photos, one of the best pieces of advice we can give (especially when the older sibling is a toddler) is to get your location ready, get your settings sorted, then bring in baby and big brother or sister.Choose a comfortable location near good light. For example, the family bed is a great place to pose them as it’s big enough to place them in the middle of the bed and keep baby safe at the same time.
The pictures taken from your perspective, the parent who loves their baby like no other and are going to have a little something extra special about them. Just take it slow, and be sure to get a lot of rest.


And there we have it, some tips to hopefully inspire you to photograph your little one over the time we have at home in the coming weeks/months. Please feel free to get in touch if you have any questions or wish to get feedback based on photographs you have done - I’d gladly help!
Stay safe & thank you so much for reading.
See you soon!
Aga x